A Tale of Two Yurts: Yurt #1
This is the story of 2 simplified and modified yurts I built this summer. One 18 feet in diameter, the other 25 feet in diameter.This page is about the smaller one. For the page about the 25-foot diameter yurt, click here.
It’s assumed that you are somewhat familiar with yurts (or you read the main yurt page on Domerama). This section shows how to build a yurt without special knowledge or tools.
Yurts were increasingly interesting to me and I loved their transportability aspect. I started to read the PDF documents posted on Domerama in the yurts section. It became very clear that if these instructions were for DIY people, those people needed advanced skills and equipment.
Another motivation to build a yurt was that it was a great alternative to the boring gazebo or the less than practical pergola.
Making the yurt construction simple
I set out to build my first yurt with the following characteristics:
- It had to be assembled with only bolts;
- It needed to use easily available materials;
- It required no wood cuts or very few;
I was aware that the first prototype would not be the prettiest yurt, but it certainly could still be attractive and functional. But the more I looked for materials and how to assemble them, the clearer it became I could make a modified version of a yurt with spending too much money and not require any advanced woodworking knowledge.
Modifying the yurt for increased strength
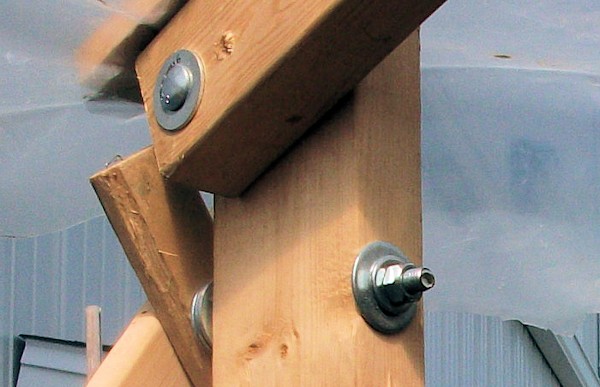
Because I am not a Mongolian nomad traveling the plains, I decided to make my first yurt very sturdy by installing 24 wall studs attached to the Khana (or lattice wall). I also decided on keeping center studs to support the center of the yurt. In effect my yurt was modified and not a pure yurt, but it would be very solid and hold up against winds, rain and other weather situations.
I started with the 2 main components: the wall studs and roof rafters. I decided on 2″X 4″ studs for the walls and 2″X 3″ studs for the rafters (roof ribs).
I wanted a 7-foot wall (84 inches), and the hardware store had them pre-cut at that length! Next came the rafters; I had a choice of different lengths but went for the standard 8-foot length. To attach the rafter and wall studs together I simply drilled a hole through each.
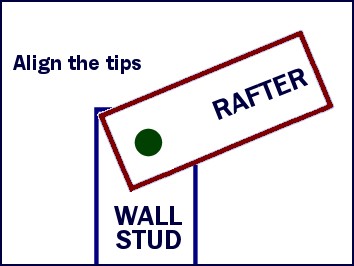
- I positioned a wall and a roof rafter stud on the ground;
- Decided on the angle (slope) I wanted for the roof;
- Aligned both pieces so that their tip would meet;
For the Khana, or lattice wall I went heavy-duty. For less than a dollar per piece, I could get a 1″ X 2″ X 8′, also known as furring. The instructions usually point to using 1/4″ thickness. I thought that maybe if I cut a 2″X 4″ lengthwise I could save money. That was not the case:
- First my self-imposed rule to avoid cuts would be broken;
- And secondly, my other rule regarding easily available materials would also be broken;
- Plus you cannot get enough slats from a stud to make the effort worthwhile.
It was simpler to use much thicker (3/4″) slats, avoid all the cutting and countless headaches. Another benefit would be that my wall would be very sturdy and make my structure even more stable.
And if that wasn’t enough, I also made the lattice wall stronger; many designs or manufacturers will use aluminum rivets to hold the slats together. These are not very strong and benefit the builders more than you. In my design I had to attach two slats of 3/4″ each, so even if I wanted to use rivets, I could not, unless I paid a lot for special size rivets, and also breaking my “easily available materials” rule.
My lattice wall, or Khana, has an additional 24 2″ X 4″ studs attached to the lattice with bolts
Also, you can see how the lattice does not support the rafters as with traditional yurts. The result is increased overall structural strength.
My lattice wall, or “that took a while”
My solution to fasten the 1″ X 2″X 8′ slats together was simple: I went into a farmer’s supply store where they sell bolts, nuts and washers by the pound. This saved me at least 30% compared to the typical hardware big box store. I made sure I bought zinc-plated for corrosion protection, although stainless steel is the best, but also way too expensive.
To assemble your lattice, you first need to drill holes into each and every slat, and you need to drill 8 holes per piece. The first hole is drilled 3 inches from the end. The following holes are drilled 12 inches apart, starting from the first hole you drilled. In my case I was using 1/4″ wider X 2 inch carriage bolts, so I made the holes a little bigger by using a 3/8″ drill bit.
Why use a carriage bolt instead of the classic 6-sided head screw? Because it has a round head, less chance to hurt anyone coming in contact with it, and it looks nicer. That’s about it!
For a 16-foot yurt, you will need approximately 50 feet of lattice, or about 72 slats, therefore 72 X 8 holes = 576 holes. You will need the following to assemble your lattice wall, or Khana:
- 288 bolts(since 2 slats require only one bolt, it’s 576 /2);
- 576 washers, if you use 2 per bolt;
- 288 nuts (since 2 slats require only one bolt, it’s 576 /2);
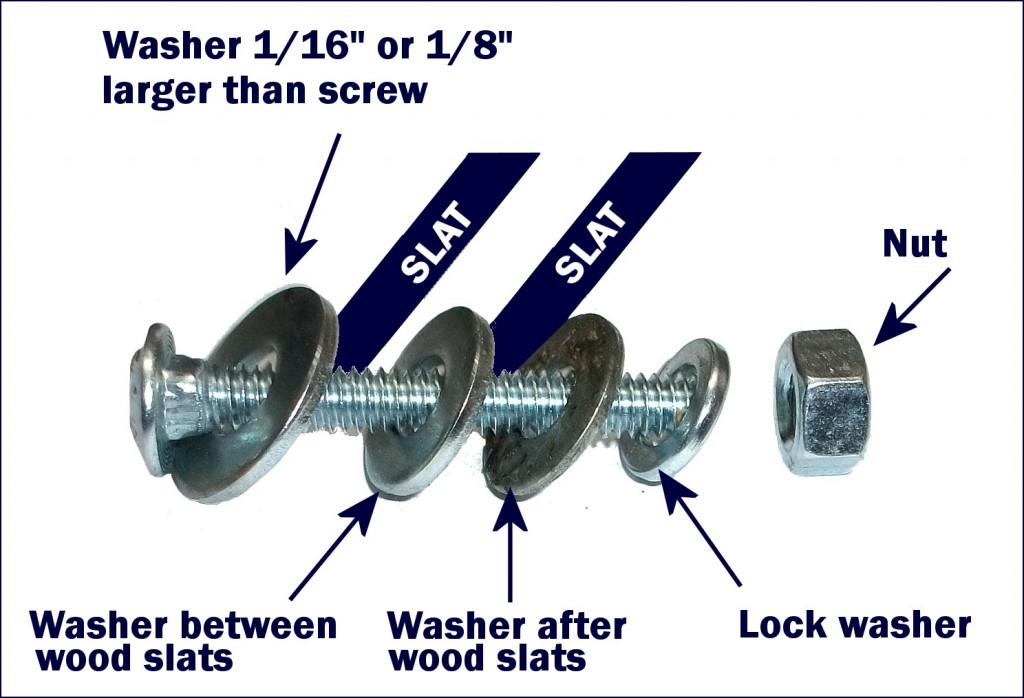
About drilling holes
The Khana (lattice wall) may requires hundreds of holes to make it, but this is not the case for the wall and rafter studs:
For wall studs:
- The most important hole is the one used to connect the wall stud to the rafter. Make one and use it as a template to drillthe others.
- The next ones are to fasten the Khana lattice wall to the wall stud, at the top and at the bottom. For this yurt I cheated a little bit because I did not drill a hole to attach the lattice wall to the wall stud: only the top bolt on each wall stud secured the Khana lattice wall, so when I stretched the diameter of the yurt wall to a larger dimension, the lattice stretched and the bottom criss-cross moved up.
For rafters:
Only one hole is required. As stated above, it’s the one that connects the rafter to the wall stud. As for the end that attaches itself to the roof ring, a regular 5″ lag screws is used.
IMPORTANT NOTE: rafters require an angle cut at the end that connects to the roof ring. In this yurt construction I made a 22.5 degree cut on each of the 24 rafters. If you want to avoid, or cannot make cuts, look into Simpson Strong Tie connectors. Some are specifically suited for angled support.
A note about washers
To avoid rot when a piece of wood touches another (a perfect example: a lattice!), insert a washer between the slats. This would make 3 washers used for each hole. Always choose zinc-plated hardware for corrosion protection, or if money is no object, stainless steel bolts, screws, washers and nuts.
You can remove the washer and keep only the lock washer, but because pine is a soft wood, I used 3 regular washers AND a lock washer. You don’t even need washers if you want to simply screw the lattice wall permanently to the wall studs. In this build it was decided to make the structure easy to dismantle and transport.
Lastly, when using carriage bolts, there is a square under the head, used to keep the bolt in place. For this yurt I inserted a slightly larger washer that goes around that square section. Some will say it’s not necessary to use a washer under the head of the bolt, but this is soft wood, not metal or plastic, and it tends to crush; the washer is there to lessen that effect.
Assembling the lattice is not as painful as you may think
It seems like an impossible operation, but it goes rather quickly if you drill 3 slats at once. For about the same effort, your required 576 holes becomes 192. And to further convince you it’s not so bad, it takes about 2 minutes to process a set of 3 slats (or 24 holes). So if you were to drill all the slats in one session, it would take 576/24 =24 sets X 2 minutes per set = 48 minutes.
So, how much was spent until now?
For the wall and roof:
- 24 X wall and 24 rafter studs “(48 pieces averaged @ $3 each): $150
- 48 X 5″ 5/16″ carriage bolts: $5
- 48 X 5/16″ nuts: $5
- 48 X 5/16 washers per bolt: $5
- 48 X 3/8″washers per bolt: $7
For the Khana lattice wall
- 72 1″ X 2″ X 8′ slats: $72
- 300 X 1/4″ X 2″ carriage bolts: $30
- 300 X 1/4″ washers: $8
- 300 X 5/16″ washers:$8
- 300 X nuts: $10
To attach the lattice to the wall studs
- 48 X 6″ bolts, 5/16″ wide: $25
- 48 X nuts, 5/16″: $8
- 96 X 3/8″ washers: $16
At this point, the estimated cost of the structure without the roof crown and the cover is $349
And so the final assembly begins…
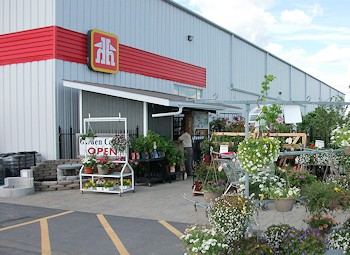
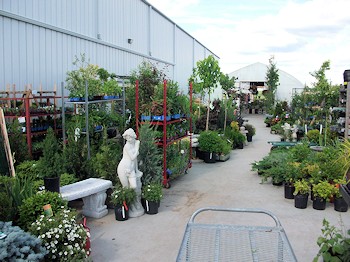
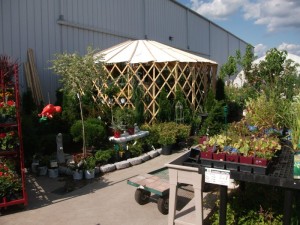
I knew the owner of the local hardware store and he let me put up a yurt on the property. Then his wife thought it would be useful to have a structure in the garden center to give shade to certain types of plants.
So I started to clear away a space to assemble my 18-foot yurt. The employees had no clue as to what I was doing, and even telling them it was a yurt did not help explain much.
The first step was to unroll the lattice. For easier transport I split the lattice into 3 parts which I connected together on site. When done I had a circular lattice wall with one door frame.
Next I attached, or bolted the 2″ X 4″ wall studs to the lattice. Now here came the first issue: I had made enough lattice for a 16-foot diameter yurt, but I wanted to make it slightly bigger. That meant 2 things could happen: If I stretch the lattice wall, it will not cover as much from top to bottom and it will also affect the height of my roof (lower the height of the yurt ring).
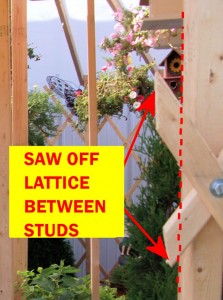
Adding 2 more entrances
I wanted people to come from multiple directions and enter the yurt. The solution was to simply add doorways. All I had to do was:
- Saw off the lattice between two wall studs
- Add some screws to attach the lattice to the wall studs (which became a door frame)
- Add a piece between them at the top, like a door frame.
The roof ring
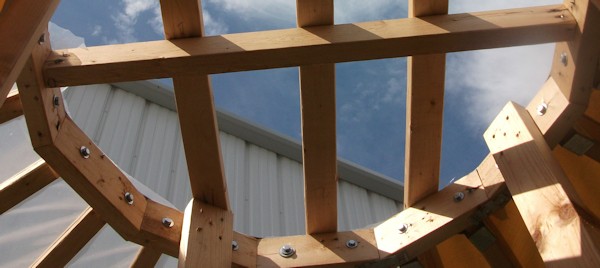
This yurt consisted of 24 rafters to form a roof. This meant 24 pieces of 2″ X 3″ lumber need to be attached to the yurt’s roof ring. After looking at various options, I chose a simple solution: make a 12-sided roof ring out of 2″ X 4″ lumber, and attaching 2 rafters per side. As you can see from the image below, some rafters have not been fully tightened. when they are the metallic support will be added.
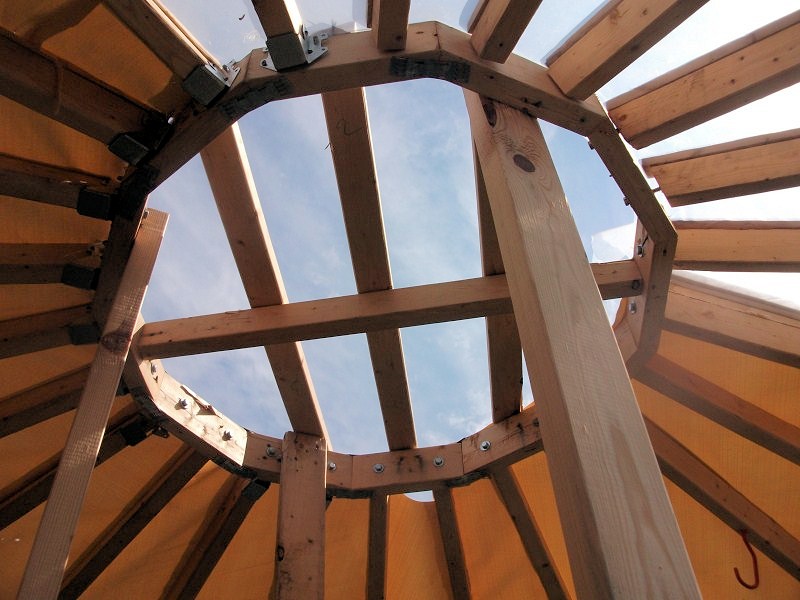
I cut 12 pieces of 10 inches each and I used the miter saw to cut angles at each end of the pieces. For 24 rafters you need to cut the ends at 15 degrees. Once you have all your pieces, screw them together.
For this yurt there will be no band or wire holding the yurt together:
- The 2″ X 4″ attached to the center ring will support part of the weight of the roof;
- The ring is made stronger with pieces running from one side to the other, as seen above;
- The rest of the weight near the perimeter will be supported by the wall studs;
- For further strength, the Khana lattice wall will be attached to the wall studs;
- Notice in the image above the lag screws for each rafter, the only time screws need to be used;
- For even greater strength, Simpsons Strong Tie plates and supports are used (as seen below);
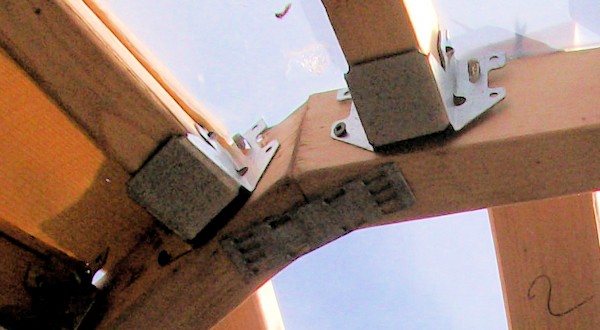
For a final touch, cut lengths of lumber that go from one side to the other and nail/screw them together.
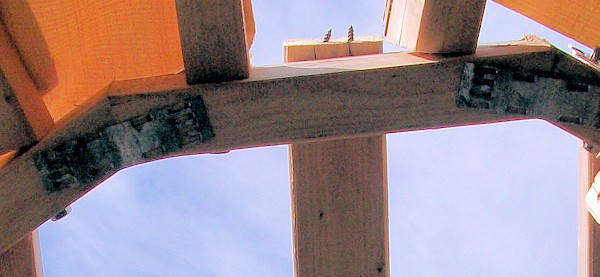
Adding a cover to the yurt
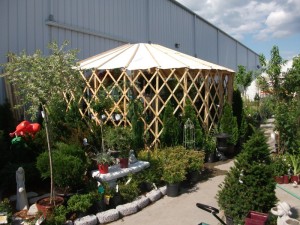
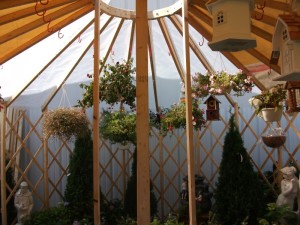
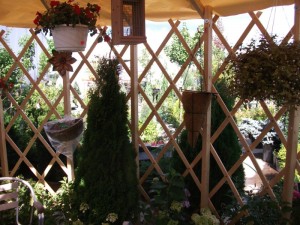
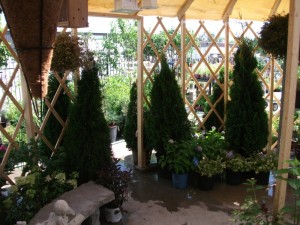
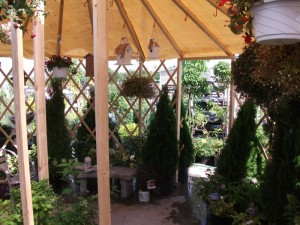
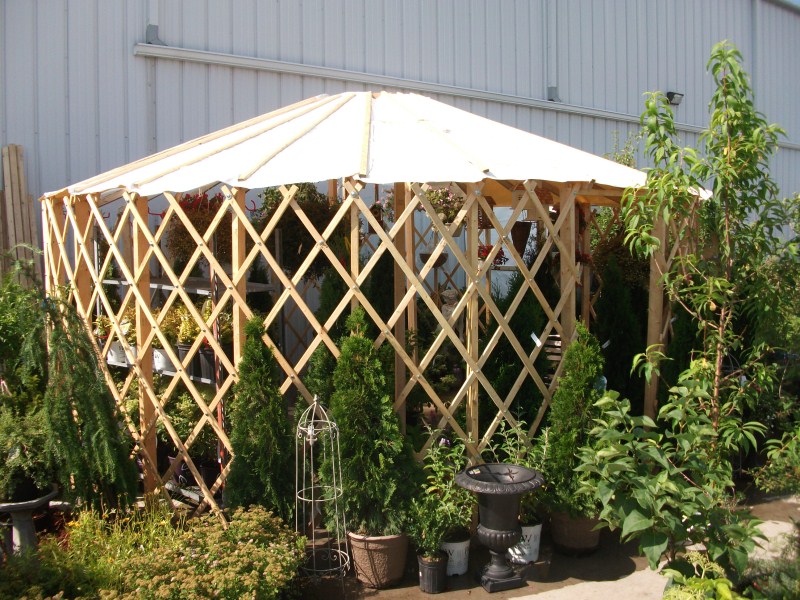
We found some opaque vinyl fabric lying around and started to staple it to the rafter. After covering more than 2/3 of the yurt, we ran out, but this turned out to be a blessing: we used the extra from when the greenhouse was covered to finish the roof. Now the yurt could store plants who need to remain in the shade and others that require only partial sunlight. You can see the effect of using both types of covering in the images at the end of this page.

The manager of the garden center wanted the roof to last throughout the year, especially winter, so we decided to add some 1″ X 2″ X 8′ slats, same as what was used for the Khana lattice wall. I stood inside the roof ring and the manager at the edge of the yurt. It took about 90 minutes in the hot sun and 2 short breaks.
Avoiding wood rot
Since one of the goals of this project was to make an inexpensive yurt, pine was chosen, Naturally the wood should be treated in the future, or the yurt could have been built using treated or cedar wood . As with decks, many wait a year or until next Spring before applying some preservative coating on the wood.
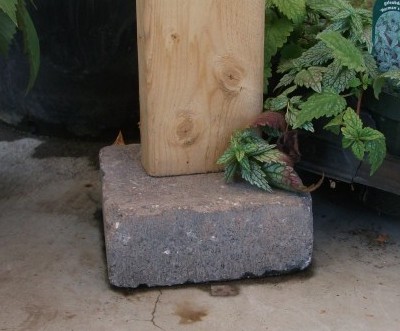
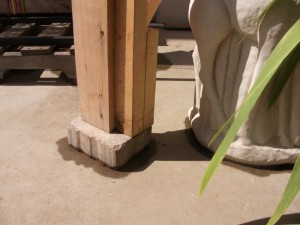
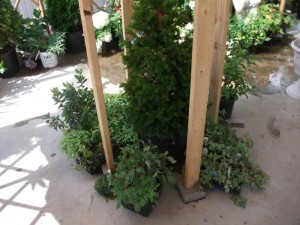
But whatever type of wood you choose, your yurt base should not have contact with the ground. In the case of my first yurt, it was installed on a concrete slab, and with plants being watered at least once a day, the yurt’s wall studs would get wait regularly. The solution was low key: use bricks under each of the 24 legs/studs.
Adapting the yurt to its intended purpose
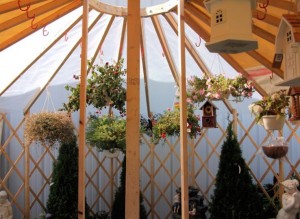
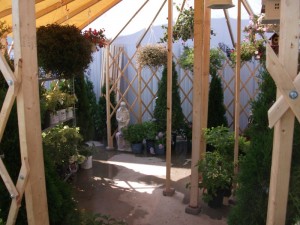
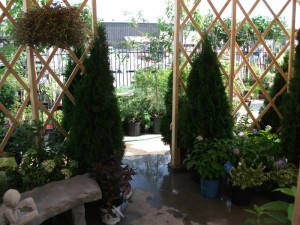
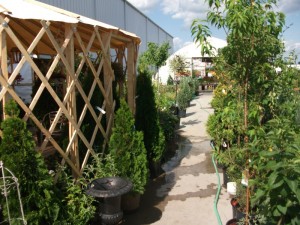
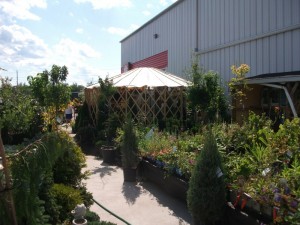
For this yurt, its main role was to protect plants from excessive sunlight while also showcasing them. In this case, the same products the store was selling were also decorative, so making the structure look good was not very difficult to do. See the images below for one of the many layouts for the yurt. As products are sold, other plants, shrubs and trees are added to give the yurt a different look every few days or so.
It instantly became an part of the garden center, showing off the products while also letting customers get out of the sun to shop in comfort. It also became a favorite place for the employees to have lunch!
And now on to the second yurt, a.k.a. the Mega Yurt
Following a strong and highly positive response from all those who saw the garden center yurt, I asked if I could build another in front of his other business, the small engine/tractor dealer. After much sighing, he agreed. This is a 25-foot diameter structure which is detailed by clicking here or by clicking on the image below.

