Yurt Platforms
Pacific Yurts is one of the premier yurt manufacturer in North America which has grown from its humble beginnings in an old Oregon dairy barn in 1978 to an industry leader. They pretty much created the yurt industry.

77456 Hwy. 99 S. Cottage Grove, OR 97424
Pacific Yurts published a short but very useful guide to making a platform for your yurt. here below is the document. You can also download it as a PDF here.
Platform Construction
Being what we call a ‘soft’ structure, the yurt reacts more readily to climatic conditions than do ‘rigid’ structures, therefore it is important to choose your site carefully and take into account prevailing wind patterns, overhead tree limbs, water runoff, etc. In general, the best site would be protected from the wind, would receive morning sun and afternoon shade and be free from overhead objects such as large dead tree limbs that could damage the yurt in heavy winds. Plan your entry so that the doorway faces away from prevailing winds.
For a secure and comfortable installation, a well-built platform is necessary. To ensure a weather proof installation the platform needs to be circular and the same diameter as the yurt so the side cover fabric can extend below the interior floor level. This will provide a raft-free and watertight seal. Any exterior decking should be separated from, or at a lower level than the yurt platform. Unless you are skilled, enlist the help of an experienced carpenter for building the platform.
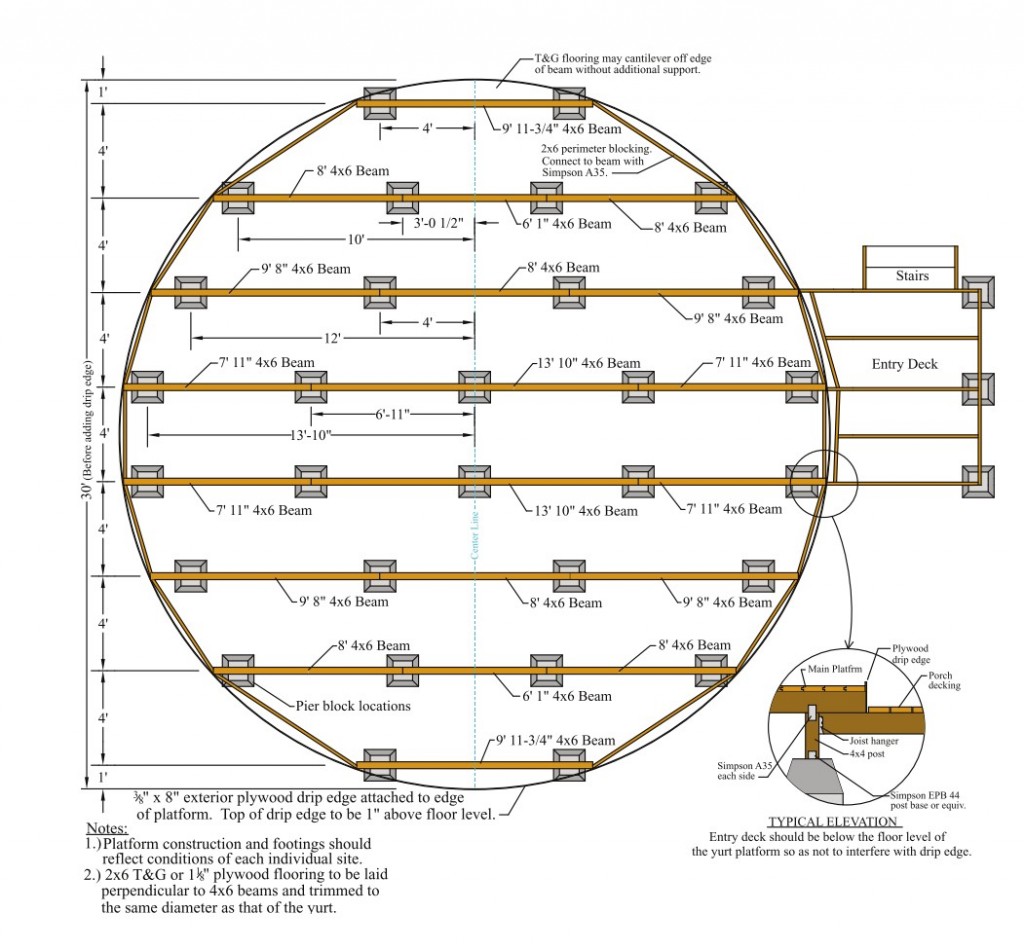
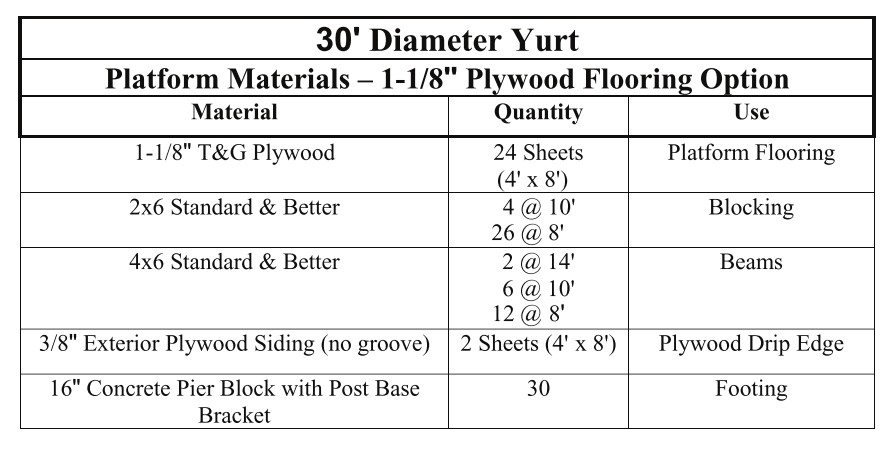
The following plans show the typical construction of the yurt platform. Keep in mind that every site will be different, so the platform construction and footings should reflect the conditions of each individual site.
Notes:
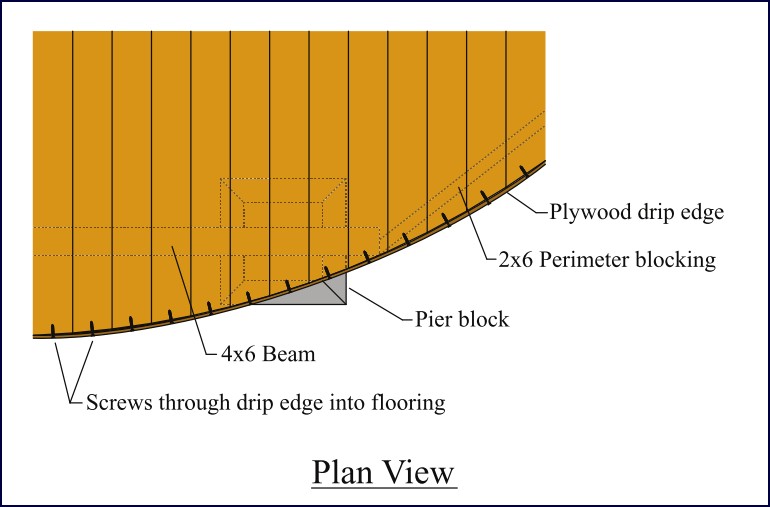
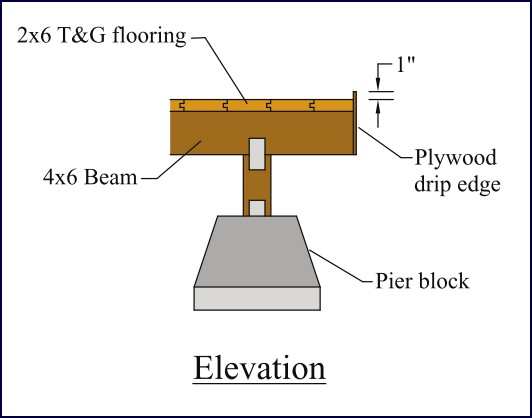
1.) The bottom portion of the drip edge will be visible once the yurt is installed. It should be stained or painted to match the exterior color scheme.
2.) The 1″ portion of the drip edge that extends above floor level will be visible on the inside and can be painted or stained to match the interior color scheme.
3.) Plywood skirting (to prevent airflow beneath the floor) and a vapor barrier may also be desirable.
4.) If you plan to connect the yurt to an existing building (or another yurt) be sure to allow a minimum of 12″ between the existing building and your yurt platform. A covered walkway can be built to connect the two after the yurt is installed.
5.) Keep in mind that the windows open from the outside. If you plan to have the platform elevated you should consider adding a catwalk or exterior decking for window access.
6.) If you plan to install a “floating” floor on your platform, please contact Pacific Yurts for recommendations on how to prepare the platform.
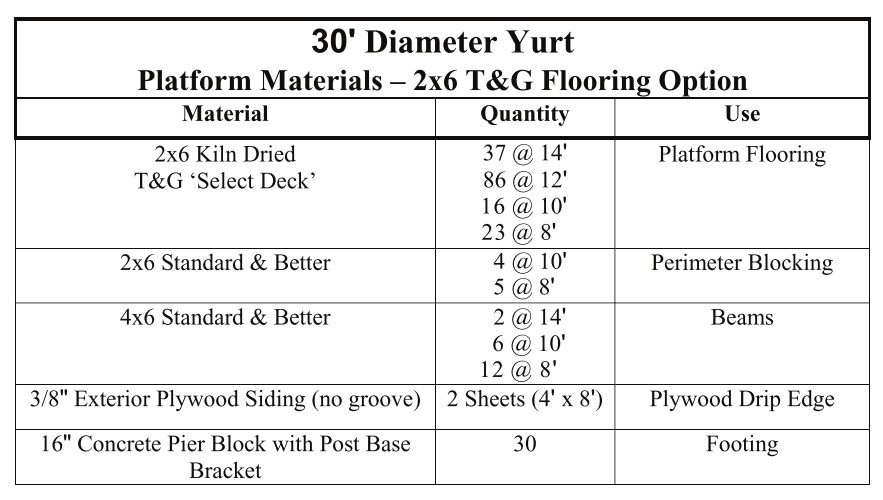
7.) When using the 2×6 T&G flooring be sure it is kiln dried and has a low moisture content to avoid gaps as the wood dries.
Platform Construction Overview
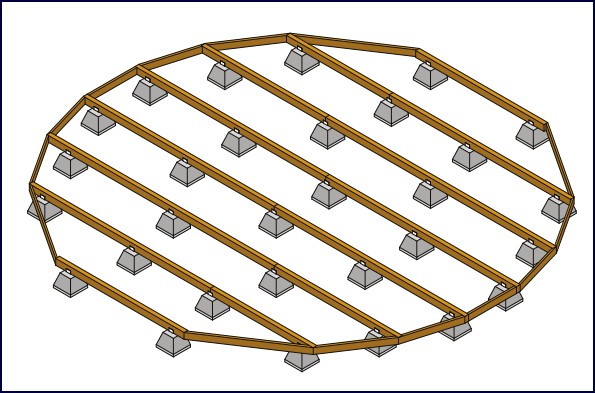
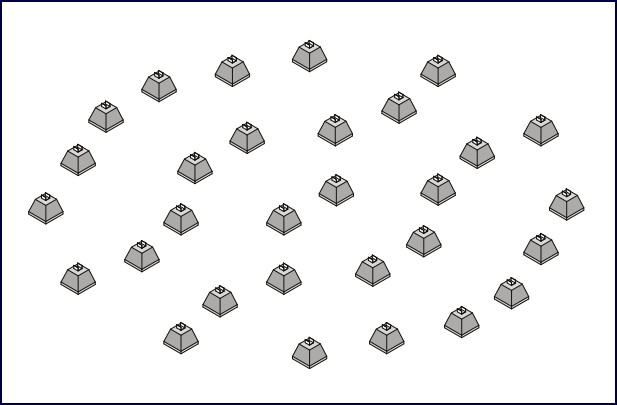 1.) Lay out pier blocks according to framing plan and level.
Note:
Poured concrete footings may be substituted for pre-cast blocks.
2.) Cut 4×6 beams to length, level them, and fasten onto pier blocks.
3.) Cut 2×6 perimeter blocking and fasten to 4×6 beams.
4.) Install floor insulation (optional).
Notes:
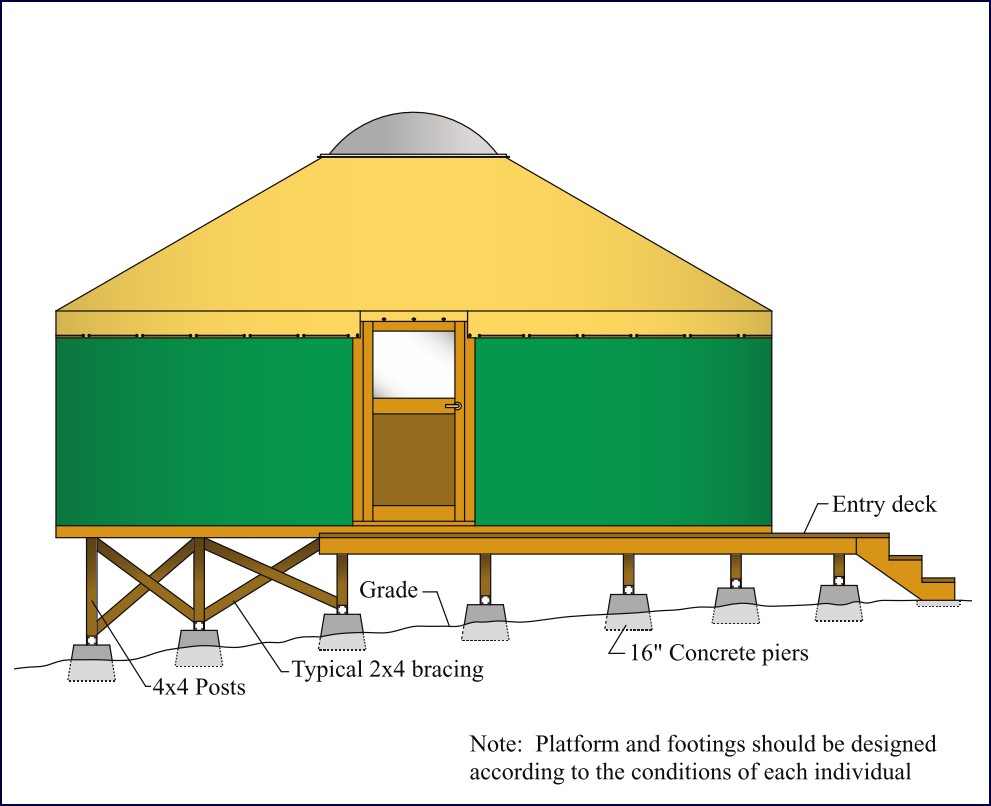
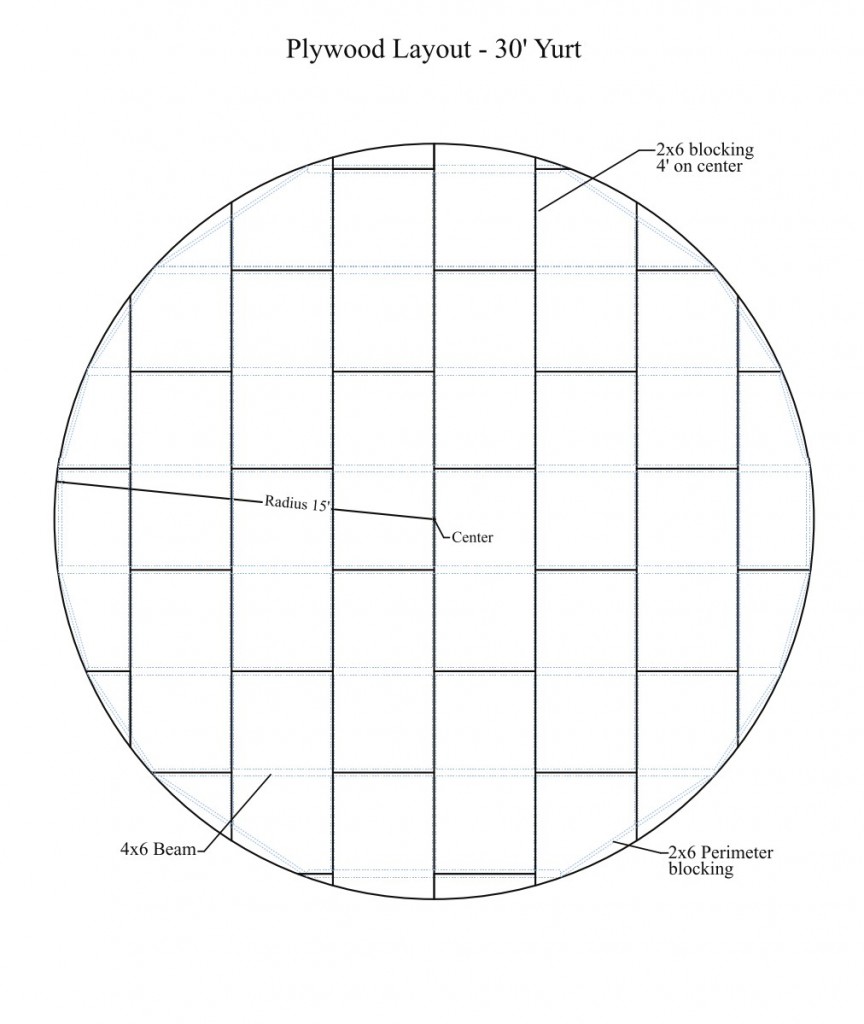
Diagram assumes level site. On sloping terrain vertical support posts and cross bracing may be necessary. If 118″ plywood flooring is used we recommend adding 2×6 blocking between beams (four feet on center). If you plan to purchase the cable tie-down option an extra 4×6 block will be needed in the center of the platform.
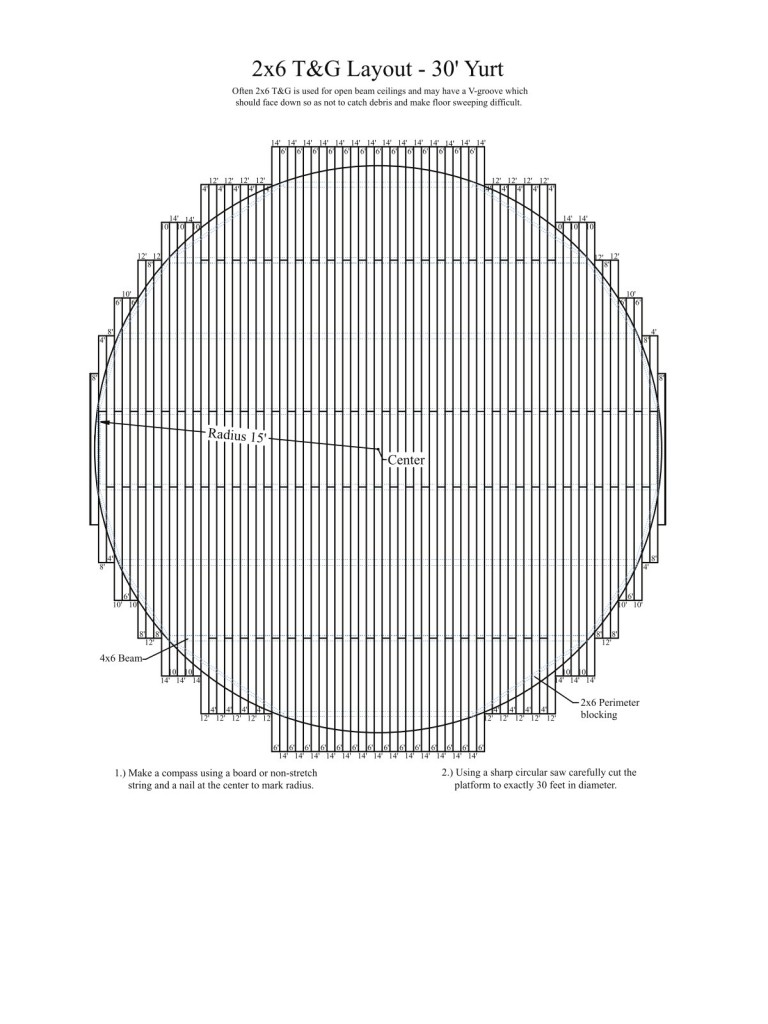
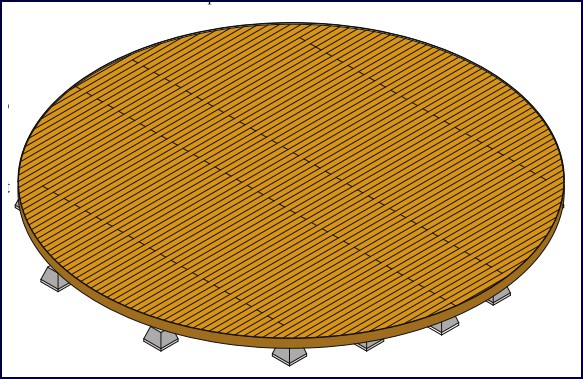 5.) Fasten flooring (1 18″ plywood or 2×6 T&G) onto 4×6 beams.
6.) Cut flooring into a circle with diameter matching that of the yurt.
7.) Staple 2″ wide strips of tar paper onto edge of cut flooring (or use caulking) to provide a seal between flooring and drip edge.
8.) Cut 38″ exterior plywood (OSB is best for small yurts) into strips of desired width (at least 8″) and fasten around perimeter of flooring so that 1″ protrudes above floor level. This is the plywood drip edge.
Typical 30′ Platform Framing Plan

